
Unlock the secret to incredible homemade pizza! Learn to make perfect pizza dough from scratch with our easy, detailed recipe. Get crispy, chewy crusts every time. Start your delicious journey today!
Table of Contents
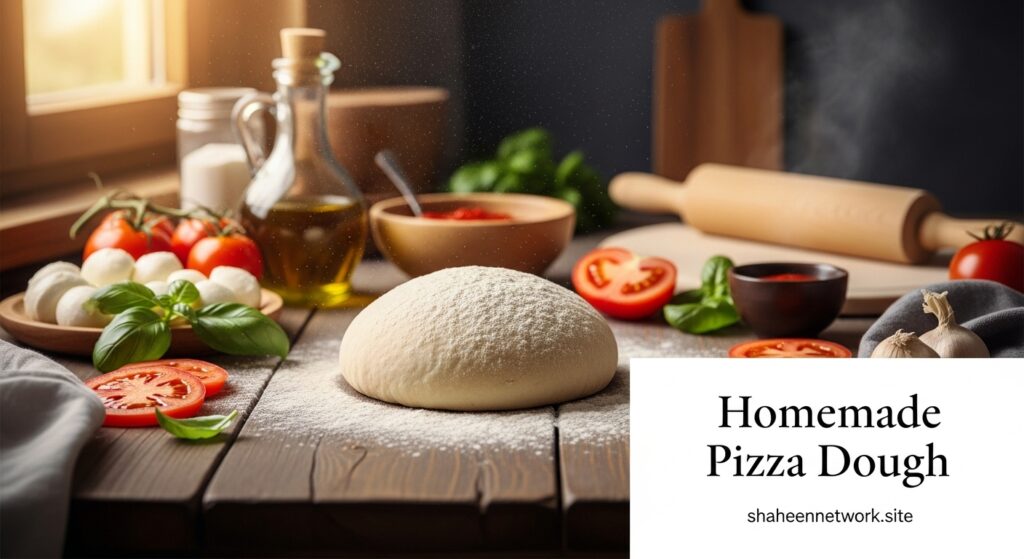
The Art of Homemade Pizza: Crafting the Perfect Dough from Scratch
There’s something uniquely satisfying about biting into a slice of homemade pizza. The aroma of freshly baked crust, bubbling cheese, and your favorite toppings creates an experience that few store-bought alternatives can rival. While the toppings are undoubtedly crucial, the true secret to an extraordinary pizza lies beneath it all: the dough. A perfectly made homemade pizza dough provides the ideal canvas, offering that delightful balance of crispy exterior and chewy interior.
Many shy away from making dough from scratch, intimidated by yeast and rising times. But fear not! This comprehensive guide will demystify the process, empowering you to create a delicious and versatile homemade pizza dough that will elevate your pizza nights to a whole new level. Forget the bland, pre-made bases; once you master this recipe, you’ll wonder why you ever settled for anything less.
Why Make Your Own Homemade Pizza Dough?
The advantages of making your own homemade pizza dough are numerous. Firstly, you have complete control over the ingredients, ensuring freshness and quality. No mysterious additives or preservatives here! Secondly, the flavor and texture are simply superior. The slow fermentation process in a well-made dough develops complex flavors that pre-packaged options can’t replicate. Thirdly, it’s incredibly cost-effective. Flour, water, yeast, and salt are pantry staples, making homemade pizza an economical choice for feeding a crowd. Finally, there’s the sheer joy and accomplishment of creating something truly delicious with your own hands. It’s a culinary journey that rewards you with incredible taste.
Essential Ingredients for Your Homemade Pizza Dough
Creating exceptional homemade pizza dough doesn’t require a long list of exotic ingredients. In fact, its beauty lies in its simplicity. Each component plays a vital role in the dough’s structure, flavor, and texture.
Here are the ingredients you’ll need:
- Warm Water (105-115°F / 40-46°C): The ideal temperature for activating yeast. Too hot will kill it, too cold will hinder its activity.
- Active Dry Yeast: The leavening agent that makes the dough rise, giving it that characteristic airy texture.
- Granulated Sugar (or Honey): A small amount of sugar acts as food for the yeast, helping to activate it and contributing to a golden crust. It’s an optional but recommended addition.
- All-Purpose Flour (or Bread Flour): The main structural component. Bread flour has a higher protein content, leading to a chewier crust, while all-purpose flour works perfectly well for a good balance.
- Fine Sea Salt: Crucial for flavor and also plays a role in regulating yeast activity and strengthening the gluten network.
- Olive Oil (Extra Virgin recommended): Adds flavor, richness, and contributes to a tender crust. It also helps prevent the dough from sticking.

The Step-by-Step Guide to Perfect Homemade Pizza Dough
Mastering homemade pizza dough is a process, but a rewarding one. Follow these steps carefully, and you’ll be a dough-making pro in no time.
Step 1: Activating the Yeast
This initial step is crucial to ensure your yeast is alive and ready to work its magic.
- In a large mixing bowl (or the bowl of a stand mixer), pour in the warm water.
- Sprinkle the active dry yeast and the granulated sugar (if using) over the water.
- Gently stir to combine.
- Let the mixture sit for 5-10 minutes. You should see a foamy layer form on the surface. This indicates that your yeast is active and thriving. If no foam appears, your water might have been too hot or too cold, or your yeast may be expired. In this case, discard and start again with fresh yeast and properly tempered water.
Step 2: Combining the Dry Ingredients
While the yeast is blooming, prepare your dry ingredients.
- In a separate medium-sized bowl, whisk together the flour and salt. This ensures the salt is evenly distributed throughout the flour.
- Having the dry ingredients ready makes for a smoother mixing process later.
Step 3: Mixing the Dough
Now it’s time to bring everything together. You can do this by hand or using a stand mixer with a dough hook.
By Hand:
- Once the yeast is foamy, add about half of the flour mixture to the yeast mixture.
- Stir with a wooden spoon or a sturdy spatula until a shaggy dough begins to form.
- Gradually add the remaining flour, mixing until all the flour is incorporated and a rough dough ball forms.
- Add the olive oil and continue to mix until it’s mostly absorbed.
With a Stand Mixer:
- With the dough hook attached, pour the activated yeast mixture into the stand mixer bowl.
- Gradually add the flour mixture, about a cup at a time, mixing on low speed until a shaggy dough forms.
- Once all the flour is added, pour in the olive oil.
Step 4: Kneading the Dough
Kneading is essential for developing the gluten network, which gives the homemade pizza dough its elasticity and chew.
By Hand:
- Lightly flour a clean work surface.
- Turn the dough out onto the floured surface.
- Begin kneading by pushing the dough away from you with the heel of your hand, then folding it back over itself.
- Rotate the dough a quarter turn and repeat. Continue kneading for 8-10 minutes. The dough will be sticky at first, but as you knead, it will become smooth, elastic, and less sticky. It should spring back when lightly poked.
With a Stand Mixer:
- Increase the mixer speed to medium-low.
- Let the mixer knead the dough for 6-8 minutes. The dough should gather around the hook and pull away from the sides of the bowl, becoming smooth and elastic.
Step 5: First Rise (Bulk Fermentation)
This is where the magic happens – the yeast gets to work, producing gas that makes the dough rise and develop flavor.
- Lightly grease a large clean bowl with a little olive oil.
- Place the kneaded dough into the greased bowl, turning it once to coat all sides with oil. This prevents it from drying out.
- Cover the bowl tightly with plastic wrap or a clean kitchen towel.
- Place the bowl in a warm, draft-free place. A slightly warm oven (turned off, but perhaps preheated to its lowest setting and then turned off) is often a good spot.
- Let the dough rise for 1-1.5 hours, or until it has doubled in size. The exact time will depend on the temperature of your environment.
Step 6: Punching Down and Dividing (Optional, but Recommended for Multiple Pizzas)
After the first rise, the dough is full of air. Punching it down gently releases some of that gas.
- Gently punch down the risen dough to deflate it.
- Turn the dough out onto a lightly floured surface.
- If making multiple pizzas, divide the dough into 1 or 2 equal portions, depending on your desired pizza size. This recipe typically yields enough for one large pizza (12-14 inches) or two smaller personal pizzas.
Step 7: Second Rise (Proofing – Optional, but Great for Flavor)
While not always strictly necessary for homemade pizza dough, a short second rise can improve texture and flavor.
- Shape each portion of dough into a smooth ball.
- Place each dough ball on a lightly floured surface or a baking sheet dusted with cornmeal (to prevent sticking).
- Cover loosely with plastic wrap or a clean kitchen towel.
- Let it rest for another 20-30 minutes. This allows the gluten to relax, making the dough easier to stretch.
Step 8: Shaping the Pizza Dough
This is where you transform your dough into a pizza base.
- Preheat your oven and pizza stone/steel (if using) to its highest setting (usually 450-500°F / 230-260°C).
- Working with one dough ball at a time, gently flatten it on a lightly floured surface.
- Starting from the center and working outwards, gently stretch the dough using your fingertips. You can also lift the dough and gently stretch it over your knuckles, allowing gravity to help. Avoid using a rolling pin if possible, as it can push out too much air and result in a dense crust.
- Aim for your desired thickness and size, leaving a slightly thicker edge for the crust.
- Carefully transfer the shaped dough to a piece of parchment paper or a lightly floured pizza peel.
Baking Your Homemade Pizza
With your perfect homemade pizza dough ready, you’re just moments away from a delicious meal.
- Add your favorite pizza sauce, cheese, and toppings. Don’t overload the pizza, as this can lead to a soggy crust.
- Carefully slide the pizza onto the preheated pizza stone or baking sheet in the oven.
- Bake for 8-15 minutes, depending on your oven and desired crispness. The crust should be golden brown, and the cheese should be bubbly and slightly browned.
- Remove the pizza from the oven, let it cool for a minute or two, then slice and enjoy your incredible homemade pizza!

Tips for Homemade Pizza Dough Success
- Measure Accurately: Especially with flour, using a kitchen scale for precise measurements can make a big difference in consistency.
- Don’t Rush the Rise: Patience is key. Let the dough rise fully for optimal texture and flavor.
- Warm Environment: Yeast loves warmth. A slightly warm, draft-free spot is ideal for rising.
- Adjust Flour as Needed: Humidity and different brands of flour can affect absorption. Add a tiny bit more flour if the dough is too sticky, or a tiny bit more water if it’s too dry, but do so sparingly.
- Don’t Over-Knead or Under-Knead: Both can negatively impact the dough. Aim for a smooth, elastic dough that springs back.
- High Heat is Your Friend: For a crispy crust and perfectly cooked toppings, bake your homemade pizza at the highest temperature your oven can achieve.
- Use a Pizza Stone or Steel: These help achieve a wonderfully crispy crust by providing intense, even heat. Preheat them for at least 30-60 minutes.
- Don’t Overload Toppings: Less is often more. Too many toppings can make your pizza soggy and difficult to cook through.
- Rest the Dough in the Fridge (Optional): For an even more complex flavor, you can let the dough cold-ferment in the refrigerator for 24-72 hours after the first rise. Bring it to room temperature before shaping.
Troubleshooting Common Homemade Pizza Dough Issues
- Dough Not Rising:
- Cold water: Ensure water is within the correct temperature range.
- Dead yeast: Check the expiration date of your yeast.
- Too much salt: Salt inhibits yeast; measure accurately.
- Cold environment: Find a warmer spot for rising.
- Crust is Too Dense/Tough:
- Under-kneaded: The gluten wasn’t properly developed.
- Too much flour: Excess flour makes the dough stiff.
- Not enough rise time: The dough needed more time to proof.
- Over-kneaded (less common): Can make the gluten too tight.
- Crust is Soggy:
- Oven not hot enough: The high heat is essential for crisping.
- Overloaded toppings: Too much moisture from toppings.
- Not preheating stone/steel: The base isn’t getting enough initial heat.
- Too thin in the middle: The dough may have been stretched too thin.
Storing Homemade Pizza Dough
If you have leftover dough or want to prepare it ahead of time:
- Refrigerator: After the first rise, lightly oil the dough, place it in an airtight container or a Ziploc bag, and store it in the refrigerator for up to 3-4 days. Bring to room temperature for 30-60 minutes before shaping.
- Freezer: After the first rise, shape the dough into individual balls. Lightly oil them, then place them on a baking sheet lined with parchment paper and freeze until solid (about 2-3 hours). Once frozen, transfer the dough balls to a freezer-safe bag. It can be stored for up to 2-3 months.
- To Thaw: Transfer the frozen dough to the refrigerator the night before, or place it on the counter at room temperature for 2-3 hours until thawed and risen.
Conclusion: Your Journey to Perfect Homemade Pizza
Making homemade pizza dough is a rewarding culinary adventure. It requires a little patience and practice, but the payoff is immense: a fresh, flavorful, and perfectly textured crust that forms the foundation of an unforgettable pizza experience. By understanding the simple science behind yeast, flour, and water, you’ll gain the confidence to experiment with different flours, seasonings, and toppings, truly making each homemade pizza your own. So, roll up your sleeves, gather your ingredients, and prepare to embark on a delicious journey that will transform your kitchen into your favorite pizzeria. Enjoy the process, and most importantly, savor every bite of your incredible homemade pizza!


